If there’s one area of planning a wedding that had me on the verge of stress tears, it was the damn wedding invites. With only three months until our wedding, the pressure was on to get them done and out, but where on earth do you start?
I started with the easy option and got a couple of quotes from Etsy and some independent wedding stationary companies who had stock designs and colour charts for you to choose from. All you had to do was input the details of the day and they’d sort out the rest, even down to supplying matching stickers for the envelopes. Going down this route would have taken pretty much all the design and print stress out of it, but for just 40 invites with envelopes it was nearly £300! And although they were lovely invitations, they were also a little dull and samey.

‘Papier’ has some amazing templates that you can edit with your details, for a pretty price.
So the only other option was to make them myself. Getting some coloured card and a hot glue gun isn’t really my thing, but then again neither is graphic design. I work in digital marketing and maintain a blog but I still would never class myself as a techy sort of person. However, when my friends insisted I try Canva to design the invites I naively thought I might actually find it a breeze. I’m gen Y, a digital native apparently. What could be so hard about a few drag and drop boxes?
Well, apparently everything! I didn’t find Canva easy to use at all and it took me a long and painful week to finally learn how to master it. It was at day six I called my sister in near tears whilst clutching a Galaxy Caramel and told her I was going to have to cancel the whole thing. But her signal was so patchy I couldn’t even hear the pep talk she was trying to give me, and so I had no choice but to pull myself together and speak to Canva’s helpdesk.
It turns out you can’t even make a trifold invitation on Canva which is what I’d been hopelessly trying to create. Canva also doesn’t recognise more than two pages in an invitation. And printing was a whole other issue in itself! More on that later…
But by day seven I was flying. Not only had I managed to design a customised invitation in my colour theme of choice, but I’d also created ‘Will you be my bridesmaid?’ cards and even envelope linings! I couldn’t be stopped! I moved onto wedding signage, table plans, place names – you name it, I was designing and printing it.

And so, now that I am a self confessed Canva wizard, I feel a strong calling to share my knowledge and skills with the rest of the world so that no other bride need stress cry over their laptop ever again. Here lies the step by step answers you’ve been looking for on how exactly to design the wedding invite of your dreams through the hellscape that is Canva.
Top Tip – Use this link if you need to speak to the helpdesk (it’s notoriously difficult to find help otherwise!)
Then use the chat bot on the bottom right to tell them your issue which will eventually go through to a real person. Sometimes the chat bot will issue you with a case number and someone will email you with an answer to your question instead which you can email back to with more information.
How to pick a wedding invitation template in Canva
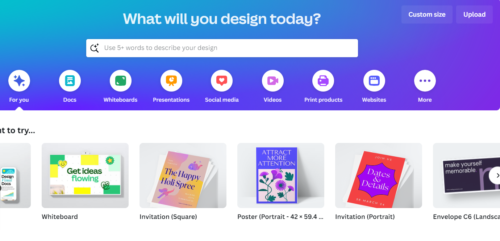
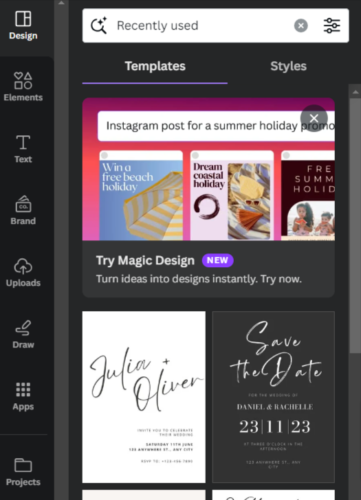
When you get to Canva’s home page you have two options. You can either type ‘wedding invitations’ into the search bar or you can click ‘custom design’ and input the measurements you need. Personally I went with the search bar because I was completely clueless and didn’t know what I wanted let alone the measurements.
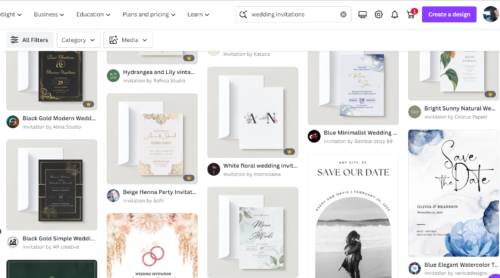
If you type in ‘wedding invitations’ you’ll be met with hundreds of different designs. You can then filter them down by format, design, theme and colour. If you want to make things easier for yourself, pick a design you love the background colour, font and design of so all you need to do is edit the info. You will save time and your sanity going with this option, but the personal satisfaction and creative control may be less so than if you design them totally from scratch yourself.
If, like me, you want a folded invitation like a card then you’ll need to search for ‘folded cards’.
Top Tip – Sign up for Canva’s free trial of their premium version to see templates that tend to be more modern and sought after. Just remember to get all your wedding stationary done asap before the trial runs out so you don’t end up with missing elements because you can no longer select them.
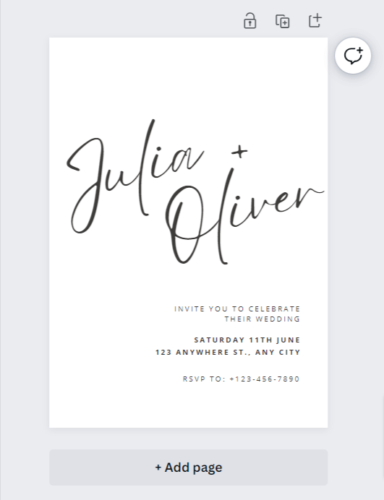
Once you’ve found one you like the look of, select it and press ‘customise this template’. You can always go back to the home screen and start again if you decide it’s not the one.
This is the first template I chose and although my final design ended up looking very different, I still kept the overall vibe of the original template.
If you wanted to go down the custom route instead of choosing a pre-made template you’ll need to decide on a size first.
To give you an idea of sizing, an A6 booklet invitation is 10.5 cm width x 14.8 cm height when folded in portrait. A square invitation is 14 x 14 cm.
Once you’ve chosen your custom size you’ll be faced with a blank invitation that you can immediately start customising however you want.
Top Tip – If you choose a design and later want to find out the size of it, just go to file and it will have the measurements immediately under the name of the file, or you can hover over your URL tab.
How to customise a wedding invitation template in Canva
Canva is a basic drag and drop system. Everything you need to customise the template is on the sidebar to your left.
If you hover over any area of your invitation you’ll see what you can select and change – which is literally everything! You can add text boxes, change the font and size, add pictures from your phone or laptop, change the colour scheme, move the design elements around – anything you need to fully put your imprint on the design. If you make a change and don’t love it you easily can click the undo and re-do buttons along the top bar.
Top Tip – Your changes will save automatically as you go along but if you wanted to try a few different fonts out for example and then compare you can go into ‘File’ and then ‘Make a Copy’ and name the file something like ‘Moontime Font’ or ‘Version 3’. You can also save all your copies in a folder so you could keep ‘pre-wedding day’ stationary in one folder (save the dates, invites, RSVP cards, bridesmaid and groomsmen cards, etc.) and ‘during the wedding’ stationary in another (seating plans, welcome to the wedding signs, place settings, sign the guest book sign, and table numbers, etc.)
How to change your wedding invitation colours in Canva
If you like the background colour of your template then you’re good to go, but if you’d like to change it then you need to click on the actual page so that a colour box comes up next to ‘Animate’.

Click on the colour box and it will open up a side bar of different colours that you can select. I created a custom pink by choosing the red gradient and trialling different pinks. I changed the intensity of the pink several times through the design process so don’t be afraid to click on the whole page again and switch the background up a few times until you’re sure.

Top Tip – Download the invite to your phone when you’re done designing the whole thing (click share > download on the desktop version to see a mock up or go through the mobile app to see it on your phone). You can get a better idea of how intense a colour is before you hit ‘print’. This is what made me choose a paler pink that wasn’t so sugar plum fairy!
When you’ve chosen the background colour (and any additional colours you like for the text and graphics), add them to your brand colours in the colour sidebar so you can create any future wedding stationary in the same shades. If you don’t you’ll need to click an element of your last project and then hover over the colour square to see the exact identifying number for that colour and then type it into the colour bar next time (I had to do this many times and it’s a chore!).
Top Tip – Duplicate your page if you’re doing invites with more than one page so you don’t have to find the same colours each time. It’s the plus in a square box when you click the whole page.
How to add elements to your Canva invitation
If you want to add flowers, moons, vine leaves, boxes, borders, lines, even graphics, photos, videos and AI generated images, then select ‘Elements’ in the sidebar. You can either search for what you’re after and have every type of asset come up, or go to the relevant category such as graphics and then search there if you don’t want the kitchen sink.
I was looking for vine leaves to add an outdoorsy feel to mine so I selected ‘Graphics’ and typed in ‘vine leaf border’.

By upgrading to Canva’s premium version you can access every kind of font and element (they’re the one’s with the crown above them). When you click on an element you’d like it automatically drops into your design and you can then swivel it around, flip it back and forth and move it into place.
Top Tip – Use the duplicate button (the one with the plus on it when you click an element on the page) to copy and paste elements you want to use several times or even to create text boxes easily so you don’t have to keep selecting the same font.

If you like the look of an element and want to see similar things by that illustrator then select the element, scroll down to ‘Magic Recommendations’ and ‘See All’ and then it will say at the top ‘See more by (illustrator). If you select this then you’ll see all the similar designs by that person which may end up being a better fit for your design.

Top Tip – Experiment with the graphics to create something truly unique. I liked the look of the vine leaf border element I’d chosen for the first page of my invite but it didn’t look quite right on the second page. I wanted the vine leaf theme to flow through the whole invitation though so I duplicated the graphic and turned it upside down so half of the border was hidden. I then found some single vines by the same illustrator and flipped and swivelled them to create a truly unique vine leaf curtain.

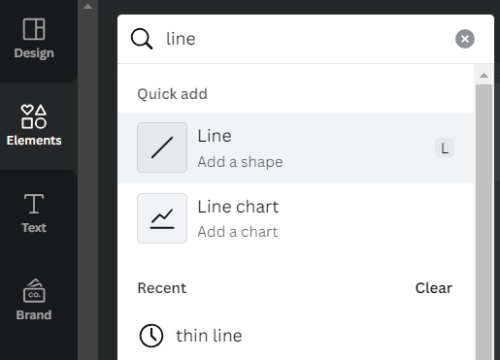
Top Tip – If you want to add lines into your design, don’t just use any line in elements because you can’t shorten or lengthen all of them. Go to the elements sidebar and search ‘line’ and choose the one shown in the image below. God help you if you want to move the positioning of the line though. My best advice is to copy and paste line elements you like from other templates if you’re able to and try and work with that.
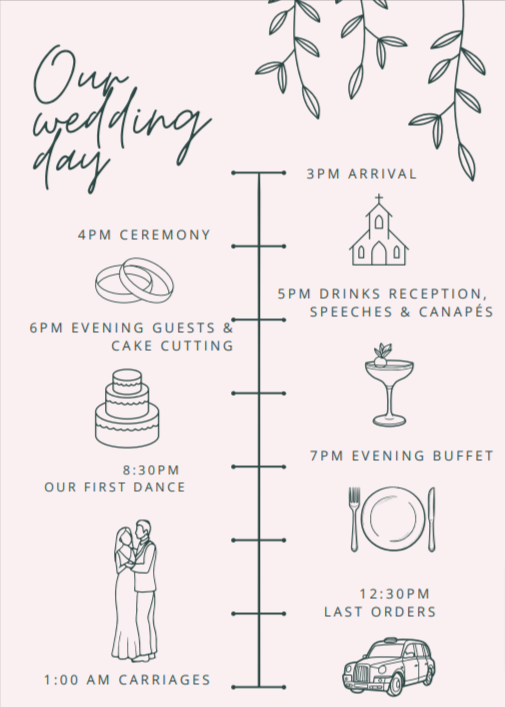
I also used the elements sidebar to create a timeline for the day with graphics. I searched for ‘timeline’, then the individual graphics such as ‘wedding chapel’ and ‘first dance’, and then added text boxes for the times.

Top Tip – If you want to make sure nothing is cut off when your invites go to print then add a margin in. Go to File > View Settings > Select Print Bleed > Select Show Margins. Some people like to leave these in so whoever is printing knows exactly where to cut to size but personally I wouldn’t as sometimes the line can show slightly when you get the invites back.
What are some Canva fonts that go well together in wedding invitations?
I looked on TikTok for inspiration to see what fonts others had used and ended up going with ‘Moontime’ for the stand out wording and ‘Open Sans’ for the information wording.
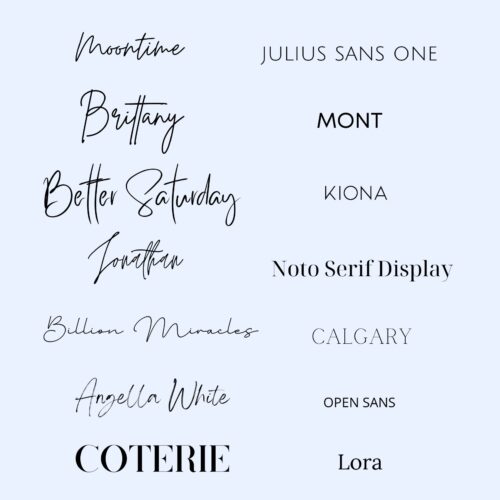
Top Tip – Try fonts out in capitals and non capitals before you disregard them. ‘Open Sans’ looks super basic when it’s not in capitals and it also looks terrible when used on big A2 signs, whereas in all caps on small A6 invites it goes perfectly. There will be some fonts you fall in love with from TikTok or Pinterest but when you try them out they simply don’t fit your design properly, look too busy, get lost in the graphics, or don’t pop against your background colour.
How to print your invites with Canva
- Once you’ve tweaked your wedding invites to the point you’re sick of looking at them, you’re ready to print. If you decide to make life easy for yourself and print with Canva then you just need to press ‘Share’ and ‘Print with Canva’ near the bottom. If you went with a custom size rather than an invitation template it will ask you how you want to publish and you just need to search for ‘Invitations’ or ‘Square Cards’ or whatever you had in mind. It might ask if you want portrait or landscape depending on the shape and it may also ask if you want to resize to which you should say ‘yes’.
- You then need to select the pages you want to print (when I tried to select all three pages it would only let me choose two which is how I ended up speaking to the helpdesk and getting them to transfer my design to a folded card with three pages). Then paper type, paper finish and how many invites you need plus whether you would like envelopes included.
- Once you’ve made your selections Canva will ask you to fix any errors so that nothing gets missed off the edges when the cards are printed. I said yes to all and nothing went awry so I suggest you do the same. It will then show you a final copy that you can download in any file type you like. If you would like to send invites via WhatsApp (we sent our evening invites this way to our rugby team guests as we knew paper invites would get lost at the bottom of their training bags) then you can download your invite through the app and save on your phone.
- If you’re happy with the final design then you’re good to go. Just remember to add any discount codes at checkout!
Should you use Canva for printing?
Personally I think no. For one thing, the price is three times what other printing sites charge! Canva also only lets you print in quantities of 1, 5, 10, 25, 50, 100 and so on. There are only three paper or card choices you can select at checkout – the standard paper is see through so if you’ve gone for a double sided design, bare this in mind. There’s no images to show you the quality or colour of the premium and deluxe cards and you also have no choice of envelope. In my opinion if you’ve selected the deluxe card and it comes in a standard envelope then you’ve undone all your hard work in creating a premium looking wedding invitation.
Where should you print your Canva wedding invitations?
After calling round all the local printing shops in my area and getting no answer, I went searching for online printing companies and found Printed.com. Here’s a step by step on how I printed my wedding invitations with them:
- Go to ‘Collections’ and then ‘Bride and Groom’
- Choose ‘Before the Day’ for invitations

- Choose ‘Wedding Invitations’ and select the type of invite your design was created for. I chose ‘Folded Cards’ and then ‘Long Edge Fold’ and ‘Standard Shape’.

- Then you need to select the size. For folded cards it’s whatever the size is when it’s folded which is usually A6 or 105mm x 148mm.
- Select whether you want both sides printed or just one. I went for both sides with it being a card.
- It then gives you different paper options to select. I went with Fresco Gesso which is a textured finish with a bright white hue. The colour wasn’t hugely important as my invitation background colour is pale pink anyway. If you prefer more of an off-white colour but you like the hammered finish then go for Tintoretto Gesso which is very similar.


- You can then input how many you want and if you want to print with more than one design. This means if you’re doing day invites and evening invites but want them on the same paper type and shape, then you can assign the quantity you want of each different design rather than having to go through the printing process twice. Genius!
- Then it’s lamination, corner shape and personalisation. The latter is a great option if you want to add the names of your guests to each invitation – you can simply upload a .CSV file of all your guests and the people at Printed.com will sort it all out for you.
- Finally you need to choose envelopes (unless you want to source your own). I went with Tinteretto Gesso because there was no Fresco Gesso option – I don’t know why! Bare in mind though that the envelope won’t feel as thick and premium as the card because the weights are different. If you want a thicker envelope do what I did and make some envelope liners on Canva and stick them in with pritt stick.

- Finally you need to upload your design by clicking the ‘Upload Artwork’ button on the right hand side. When you download your design through Canva make sure to save it as a PDF print which is the best option for professional printing, and change the colour profile to CMYK to make sure the colours come through as you intend them to. Again, you’ll need the premium version in order to select this. Download the design and upload it to Printed.com.

- Check the bleed area and print area are good to go and then select whether you want an actual person to look over your design before it gets printed. They’ll give you a call or email if there’s an issue and actually fix it for you! This doesn’t hold up the printing schedule either but for £2.50 it saves a lot of headaches when it comes to having to re-print should anything go wrong. I had a paragraph that was slightly too close to the middle of the card and they re-printed them for me even though it was my own fault.
- And that’s it!
Is it worth creating your DIY wedding invites in Canva?
Yes. Has the stress of it brought me out in total body hives? Also yes. I was heavily influenced to try Canva by two things; the low cost of creating and printing your invites yourself, and my friends who reassured me it was the easiest thing ever. Yet after I’d messaged them to say I’d hit rock bottom with it, they all sheepishly admitted that, actually, it had been quite difficult to master after all. So I certainly won’t be listening to them ever again.
However, the personal satisfaction I’ve found from creating these invites from scratch all by myself, and the self confidence I’ve gained in my tech and creative skills, has definitely been worth the lows.
If you’re a perfectionist like me then you’ll both delight in yet loathe entirely the ability to customise every little thing about your invites. My best advice is to create something that looks near to the vision in your head and then duplicate the page and create a few alternatives. Then close your laptop and sleep on it. In the morning pick the version that shouts out to you and don’t look back.
Ultimately Canva will frustrate the hell out of you by how such seemingly simple things can be so endlessly difficult to find, create and execute. But the end result will be worth your labour of love because you made it for your wedding. And really, what creative process worth going through doesn’t involve a few ugly cries along the way?

